Cooking How-To: Maximizing Duck(ling) Utility
Now that I've gotten past my lazy non-writing slump, I have found myself on a creative roll. Since the semester is over, I can no longer pour my artistic energy and stresses into printmaking, so here I am sitting at the front desk of Towers again. I have my jazz mix open on Spotify, and am comfortably typing these words to the soothing voice of Edith Piaf. The time is currently 11:40 am, and I have to sit here until 3:00 pm. Hopefully that will be enough for me to wrap this post up.
So, this post. This is one of the many in my Oshkosh series that have been ignored since late March, and will probably be one of my lesser read ones. Because I mean who wants to learn how to take one duckling and turn it into a meal of seared breasts and thighs, render duck fat, and make duck stock?
I do, because I'm a massive food nerd. Hence why I am actually excited at the idea of finishing this post. You are warned, however, that this is not a pretty post. There are photos of carcasses being dismembered. Now that that's been said. Let's do this thing.

Things you will need:
• A whole duck
• A sharp knife
• An iron will
Start with a whole duck. Preferably, you would be working with a fresh duck, but Fletcher and I only managed to find a whole frozen duckling. Actually, it's not fair to use "only" in this context, because we didn't know what we could expect to find. Thankfully, a new butcher had just opened up in town called Butcher Block Meats & Cheeses and they carried duck breasts as well as whole frozen duck. We also picked up some excellent locally smoked Gouda and prosciutto for a smorgasbord.
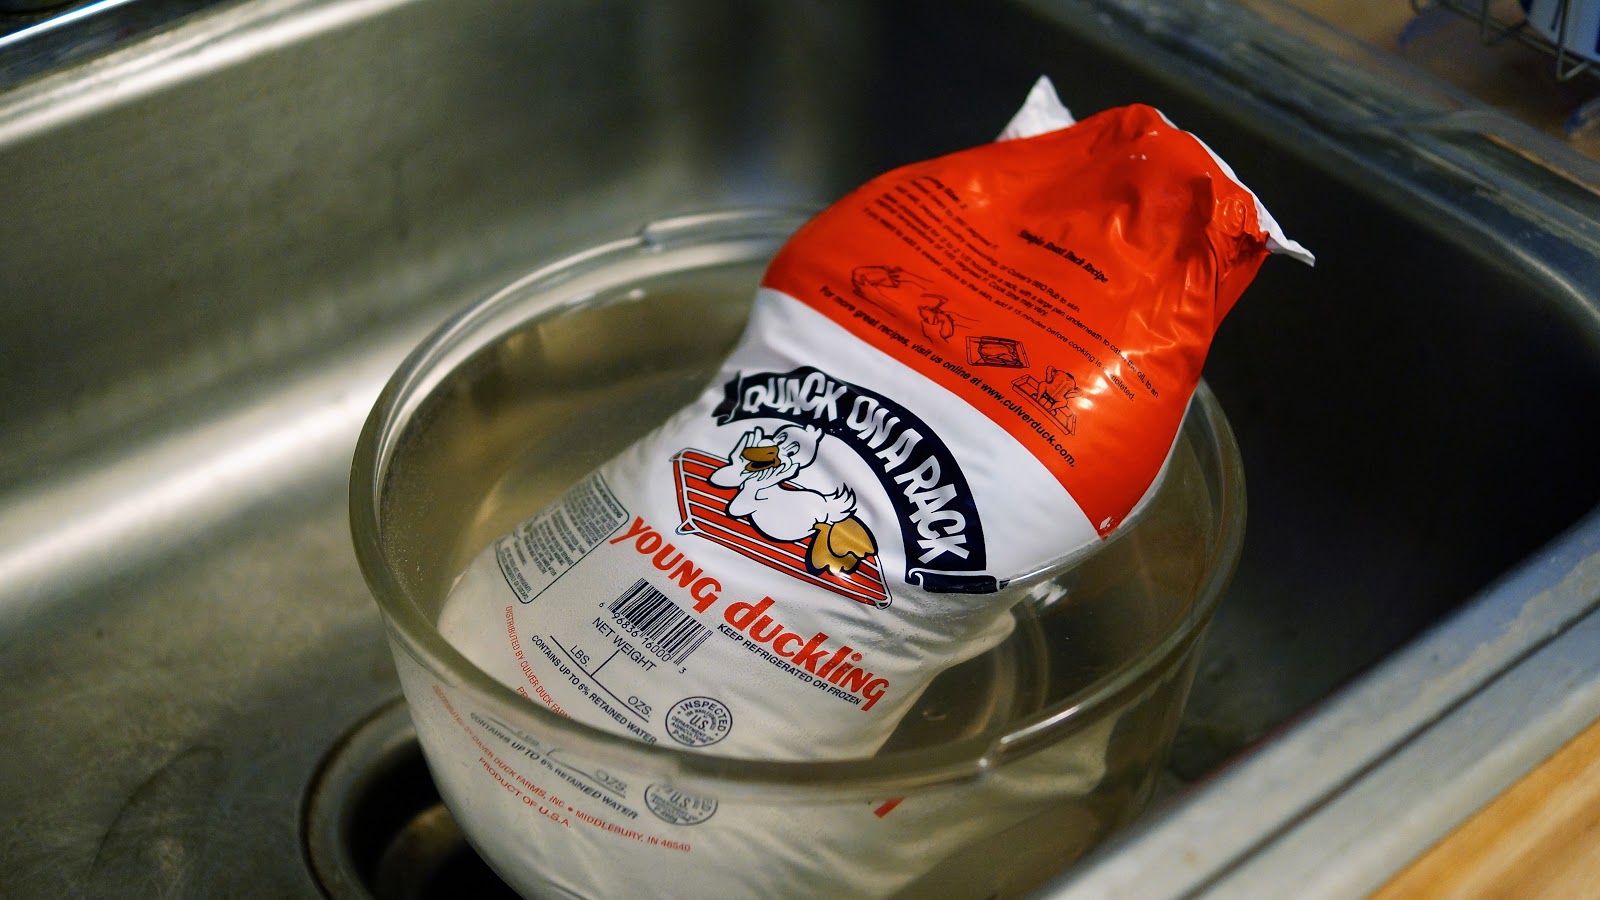
Also, I mean, look at the package. It's called a "Quack on a Rack." I should learn to be more content.
If you have a frozen duck like we did, you'll need to start defrosting it the night before you are going to cook it. This should be done by placing the entire duck(ling) in a large bowl and sitting it under running water. DO NOT REMOVE IT FROM THE PACKAGE. The water should be as close to room temperature as possible, and just leave the arrangement as such for a few hours. Make sure to go back and flip the duck every once in a while to make sure it's thawing throughout. Once that's gone for a few hours, drain the bowl and place the duck in the fridge for a last overnight rest.

Remove the duck from the fridge at least a few hours before you plan on cooking with it. Cut off the package and remove all the neck and organs from the cavity, and rinse everything thoroughly under cold water until the liquid runs clear. Also reach into the cavity and remove any of the white sinews hanging from bones. Just kind of stick your hand into the cavity, twist the sinews around your fingers, and yank them out.
Next, pat the entire duck dry with a paper towel. This is to ensure that things don't slip out as you're pushing full force with a very sharp knife. You know, because that's potentially really dangerous. If you have a really clean rag you don't mind putting between the duck and the cutting board, that's also an option you can opt for.

First step is to take off the wings. Grab the wing firmly in one hand while stabilizing the body with the other, and just pull and twist until the socket has been dislocated. Then take your knife and carefully cut through the ball joint and sinews connecting it to the body. I don't suggest just hacking away because you risk damaging the breast, which will likely be the centerpiece of your meal.
Once you've got the wings off, set aside to make a stock.
Next bit to tackle are the thighs. I've found it's easier to start with the breast side up, because of the way the thighs are positioned. You can just pull the leg away from the body and cut through the tautest part of the skin and the muscle. Pretty soon you'll see a clear divide between the leg and the body, and once you get down to the bone just cut through the ball joint and sever the entire morsel with one clean cut.

Next is the breast. I was so absorbed in the process that I never managed to actually stop and take pictures of what I was doing, so my apologies. Fletcher was also in the shower at this point, so I was left to my own devices of brutal slaughter. There was definitely some channeling of Hannibal Lecter going on, and it's not an exaggeration.
Take the point of your knife, and bring it firmly down on the top of the breastbone and follow the line down the center sternum. Then just carefully follow the shape of each lobe as close to the bone as possible with the tip of your knife. When it comes to the ending bits, don't be afraid to leave more on there than you should, because it can all be trimmed off afterwards. Once both lobes of the breast are off, you are left with something that looks like this:

Skin it. Take skin pieces in your hand and cut them off the body until there is positively nothing left except for the carcass itself. Why am I doing this, you ask? Why, to render duck fat of course. Duck fat is one of the most beautiful things on the face of this planet, and rendering it is a simple, but painful procedure. We will get there later, but in the mean time just dice up the skin and the fat into roughly square inch pieces. Set that aside to deal with later.
At this point in the process, I was in some sort of brutal cannibalistic high. I had just taken apart a whole duck, skinned it, and I was about to cut its carcass up into manageable pieces to fit into Fletcher's gorgeous Le Creuset pot so we could make duck stock. The spine, I discovered, was too firm to whack through with a knife, so Fletcher - having just gotten out of the shower - walked into his kitchen to discover me, perspiring slightly, with an entire duck carcass in my hand screaming: "I AM GOING TO BREAK ITS SPINE. I AM GOING. TO. BREAK. THE SPINE!"

I'm not even kidding. It took me about three tries before I could actually bring myself to do it, but then - letting out a guttural animalistic roar - I managed to crack and twist the spine into two halves. Yup. I'm pretty sure I should've consulted a therapist after that, not for the trauma but for how much I enjoyed it. It was quite an exhilarating feeling, especially seeing how neatly everything came out. It was like Dexter meets Hannibal with a touch of Anthony Bourdain. I am the most graceful and non-threatening female cook on the face of this planet.
Of course if you have a large meat cleaver, the whole thing would be less hands on. Literally. Maybe I'll try that next time, because god knows what kind of psychotic break another duck massacre would trigger in my head...
But if you've gotten this far and haven't completely lost your shit yet, this is what you should have:

From left to right, you've got: skin for rendering fat, innards and neck for stock and/or for a snack, thighs and breasts for a main meat course, and the carcass for a stock. What you want to put in the stock is up to you, but we did basically the standard with carrots, celery, spring onions, and some yellow onion, but also threw in a parsnip and there might have been garlic as well, but I'm not sure anymore.
That's what happens when you put off writing a food blog for two months and your original pictures get deleted off your laptop because of a faulty update. But yeah, let's go with that.
I also really need to start writing shit down as I go, but the effort of cooking WHILE writing and taking photos might just kill me one day. So yeah, actually, sorry I'm not sorry but I'm writing nothing down to save my sanity and possibly one or more appendages.

Place all the vegetables down in a layer, then cover over with the carcasses without forgetting the wings and the neck as well. As a rule of thumb, I don't ever add salt to my stock, because whatever I am cooking can just be flavored later on, but if that's your style, I'm not going to cramp it.

Pour in as much water as the pot will hold, but at least enough to cover all the ingredients. I think Fletcher and I put in about 6 cups of water? But I honestly have NO concept of measurement when it comes to these things. It's all by content and ratio.

I used to be quite ashamed of my inability to calculate measurements in terms of cups and teaspoons and such, but I was talking to my friend about his grandmother's cooking styles, and apparently Italian grandmothers roll very much the same way as I do, so I feel a lot more vindicated.
Oh, and if you're wondering how, then, have I been writing a recipe blog for almost two years without measurements? I'm sorry to say that I've been ball parking. I think I've gotten better at it, but yeah, I've basically been guesstimating all the measurements.
Also, guesstimating is apparently a real word. Neat.

But yeah, bring the stock to a rolling boil, then down to the lowest heat setting you have and let that go for about an hour or two. Scum will float to the top as everything cooks, so just skim the scum and grease as you go. If you don't want to skim the scum, then you can opt to simply strain the whole thing at the end, which is what Fletcher did. Place some coffee filters on top of a colander, and set this contraption on top of a large bowl. Slowly spoon the stock in and let it seep through, filtering out the grease and the schmuck.
The result was a beautiful, clear, and subtle stock that was crisp and warm.

As for rendering duck fat? Patience, and some long utensils. You'll need to go in batches, and make sure that the bits are getting switched out once they get too burnt. Try and remove as much moisture as possible from the skins and from whatever utensils you have, otherwise the oil will splatter and burn the living stars out of whatever it lands on.
But there you have it! I might add on a printable and step-by-step later, but this is as far as I can go today.
The time is 2:41 pm, I am Vicky Sun, and thank you for tuning in.


Comments
Post a Comment